

What's Cooking? Vol. 3
What's Cooking? Vol. 3
Bi-weekly recipe links, techniques, and more

Coming to you this week with a shorter edition of “What’s Cooking?” A cold made its way slowly, creepily through our family two weeks ago and then it took me a full week to figure out how to be a person again. Fear not, though, I still cooked.
*New and Improved*
Technique of the Moment: BRAISING
When I was daydreaming about Can’t Help But Cook and planning out exactly what it was going to look like, I put a lot of time, effort, and thought into certain aspect of the Substack, such as my cookbook reviews. Other components - namely this bi-weekly newsletter - have been more of a “learn on the job” situation.
That being said, after two newsletters I already don’t like how I am approaching the “technique” component. It feels a bit all over the place. We went from aioli to pan roasting back to aioli, and it just got confusing.
Personally, I learn better when I’m encouraged to focus on something for a while. So, that’s what I’m gonna do here. I picked a cooking technique - braising - and we’re going to focus on it until I feel like it’s time to move on to something else. We’ll focus on:
why you might pick a braise
what it is
different ways to braise
what types of foods are best for braising
the difference between braising in a Dutch oven and a slow cooker (I’m already nervous because I know the love for the slow cooker is real, which is fine. But, it is different.)
And, of course, I’ll share braising recipes and video links to the professionals along the way. Speaking of, here is a helpful video introduction to braising by Sohla El-Waylly. Something to keep in mind as we discuss this technique is that, while the fundamentals of braising are the same, there are many different ways recipe developers adjust certain variables from one braise to the next.1
So, why braise?
Because my life is busy and your life is busy, I want to start by answering why you should incorporate braises into your cooking routine, rather than start with the question of what braising is. For at-home cooks, this really is the first - and more important - question. The reasons to pick a braise are much more appealing at first glance than a discussion of what it is. Think of this as my pitch to you. And if I convince you, then you can get excited for the weeks of braising obsession that are to follow.
Lots of Meat
You can braise vegetables - and we’ll talk about that - but braising is an excellent way to cook a lot of meat, which is great for (1) a large family (2) a large gathering/hosting (3) leftovers on repeat.
I made a braise from Molly Baz’s Recipe Club two Sundays ago (this recipe is proprietary, so sadly, I can’t share this with you, but you can join “The Club” for $5 a month if you want). I used a 4.5-lb piece of boneless pork shoulder to make the Cream-Braised Pork with Broccolini and Mustard. As you can surmise from the photo below, it made enough meat to sustain the Philadelphia Eagles’ entire offensive line (I looked it up. Google says they’re the best this year). This meal carried me and my husband (and the non-picky twin girl) through almost every lunch and dinner from Sunday night to Thursday afternoon.

This brings me to my next point: flavor. Because if you’re going to make this much food it better damn well be good.
Flavor Flavor Flavor
Braising literally means cooking in fat and a “little” bit of liquid. When you’re braising, you cook on low heat so the collagen in the meat (or the dense fibers in the veggies) breaks down and seeps into the liquid. In turn, the liquid flavors the fork-tender meat/vegetable. It’s a quid pro quo situation. I don’t want to get too technical this week because that’s what we’re going to be doing here for the foreseeable future. But, to give you a sneak peek. When you make a braise in a Dutch oven, which is one of the more popular cooking vehicles to braise, you build the liquid mixture through a combination of rendering fat, heating aromatics, and deglazing. Each of these steps builds flavor (in a way that can’t happen in a slow cooker…I’m sorry!) and if the recipe developer knows what he/she is doing, the end result is **muah**.
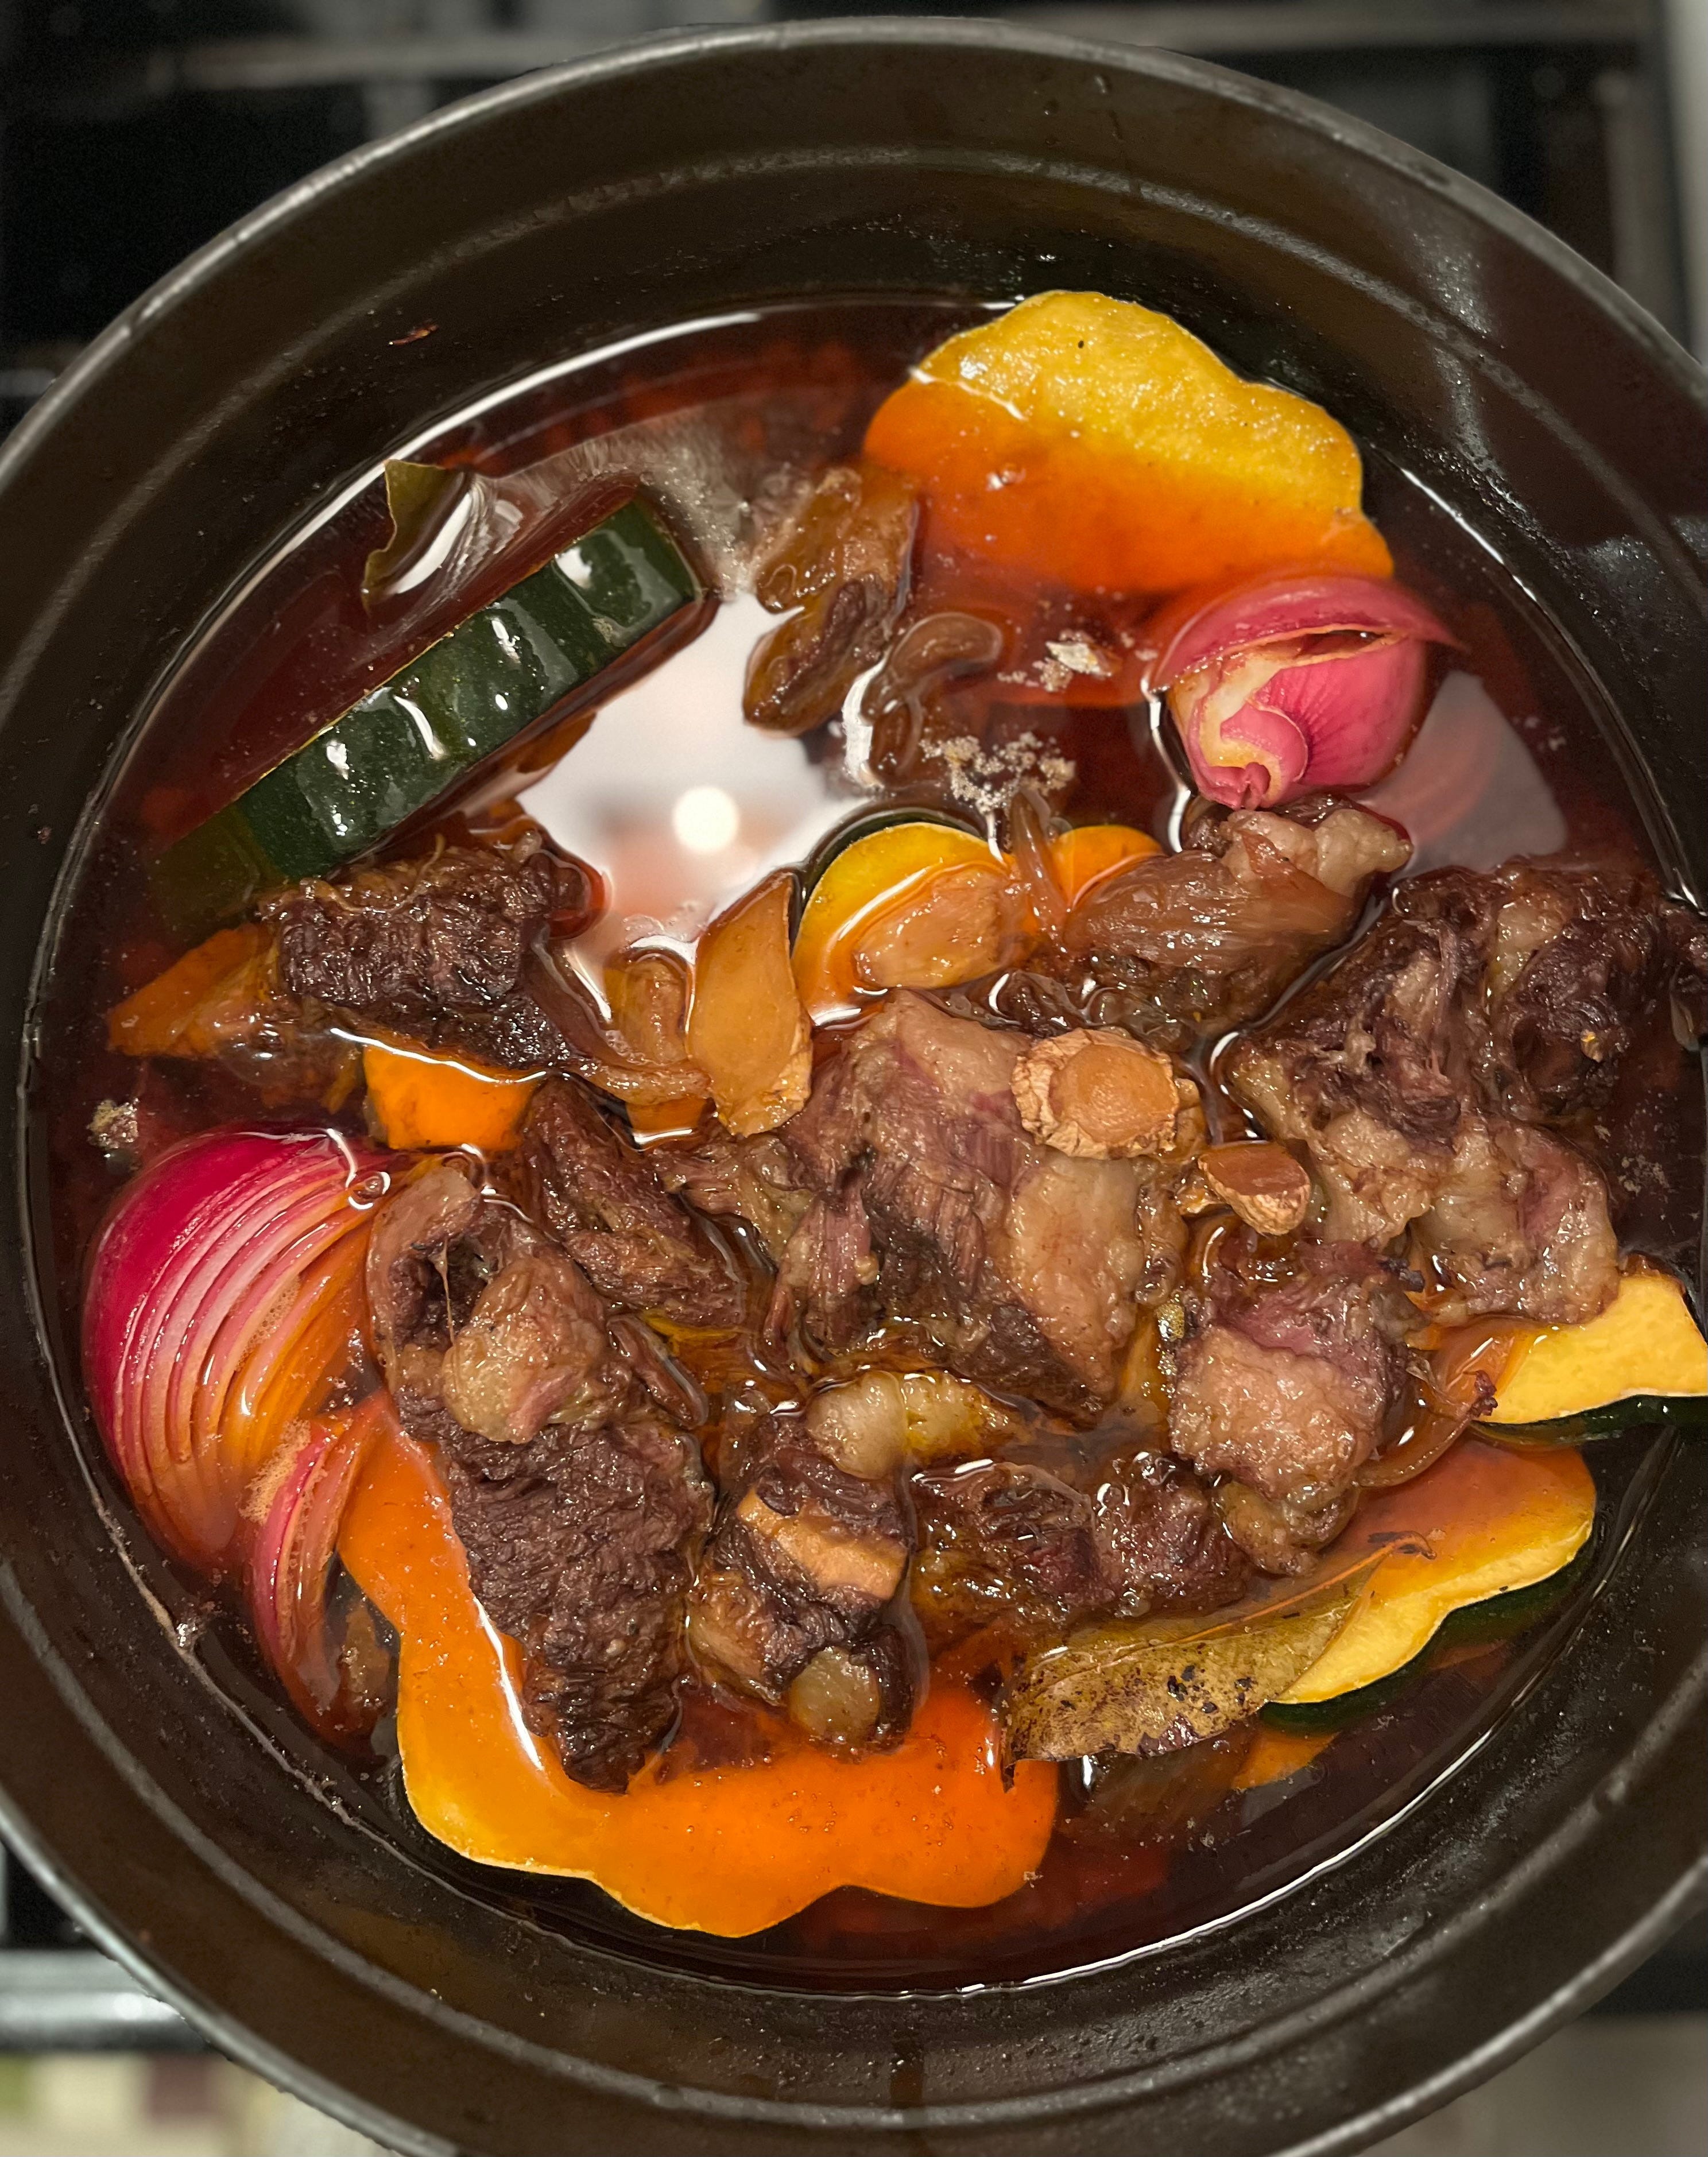
Another thing to point out here is that the flavor combinations are endless. We’re not only talking about Roast Beef with Carrots and Potatoes. We’re talking Salsa Verde-Braised Chicken Thighs, Pork Braised with Chiles, Molly Baz’s Miso Braised Chicken Legs with Leeks (More is More, pg. 178), Red Wine-Braised Short Ribs, Ali Slagle’s Olive Oil-Braised Chickpeas (I Dream of Dinner, pg. 104), and my famous riff on this Pulled Pork Recipe, which I use for Banh Mi Sandwiches. I once fed no less than 30 people with this recipe. To this day it’s my most requested recipe by friends and family. The key is to skip the BBQ sauce and build the Banh Mi from there, but, again, we’ll get there. The point is flavor and lots of variations.
Hands Off
The other beauty of a braise is that almost all of the cook time is inactive time. You do some stuff on the stovetop and then you plop it in the oven and call it a meal. There is a lot of variation where time is concerned, and this depends primarily on the type of meat you are braising. A pork shoulder or short ribs take a few hours, while chicken thighs take 40ish minutes. But, the point remains, you spend most of the “cook time” doing things other than cooking.
Pro Move for Hosting
If you’re having guests over - or want to have guests over - for dinner but are intimidated by all of the work and coordination that goes into getting food on the table, the braise is your answer to prayer. I would especially draw your attention to braises that use a fatty (albeit tougher) cut of meat, such as pork shoulder or short rib (two cuts of meat that are very very popular in the world of braising). Recipes that use either of these cuts might encourage you to make the recipe a day in advance of when you plan to eat (and even if they don’t say it, do it anyway). The directions will tell you to let the braise cool before putting it int the fridge overnight. Then, while you are dreaming sweet dreams, the “excess” fat coagulates into a firmer consistency at the top of the pot. The next day you scrape this away, which serves to enhance the flavors in the remaining braising liquid. You reheat and serve.
To recap. Making dinner a day in advance not only saves you the hair-pulling, f-bomb dropping experience in the kitchen minutes before your guests are due to arrive, but it is actually the A+ student move. If you make a braise, great! You get an A. We’re talking like a 98%. But, if you make it the day before, you’re well above 100% without all the day-of stress.
This is exactly what I did last night for a dinner we’re hosting tonight! (Here’s to hoping everything goes smoothly, and I didn’t just put my foot in my mouth)
Seasonal
You may or may not care about cooking seasonally. I very much do. I’m working on my cookbook review of More is More, and so the other night I had plans to make Molly Baz’s Shells, Peas & Buttermilk until she described it as a “very simple spring pasta dish”, and so I pivoted to her Ramen Noodles with Shrooms and Soy Butter. And, it was the right move. If you’re my friend Katie, you don’t care about anything I’ve said before this because all you’re about to hear is that braising is the epitome of fall and winter. It’s cozy and warm and it makes you want to eat dinner in your PJs by the fire with a blanket and a glass of wine.
Recipe Link (singular):
I only have one recipe link to share with you this week. But it’s a braise and, we’re going to spend some time with it today, so buckle up.
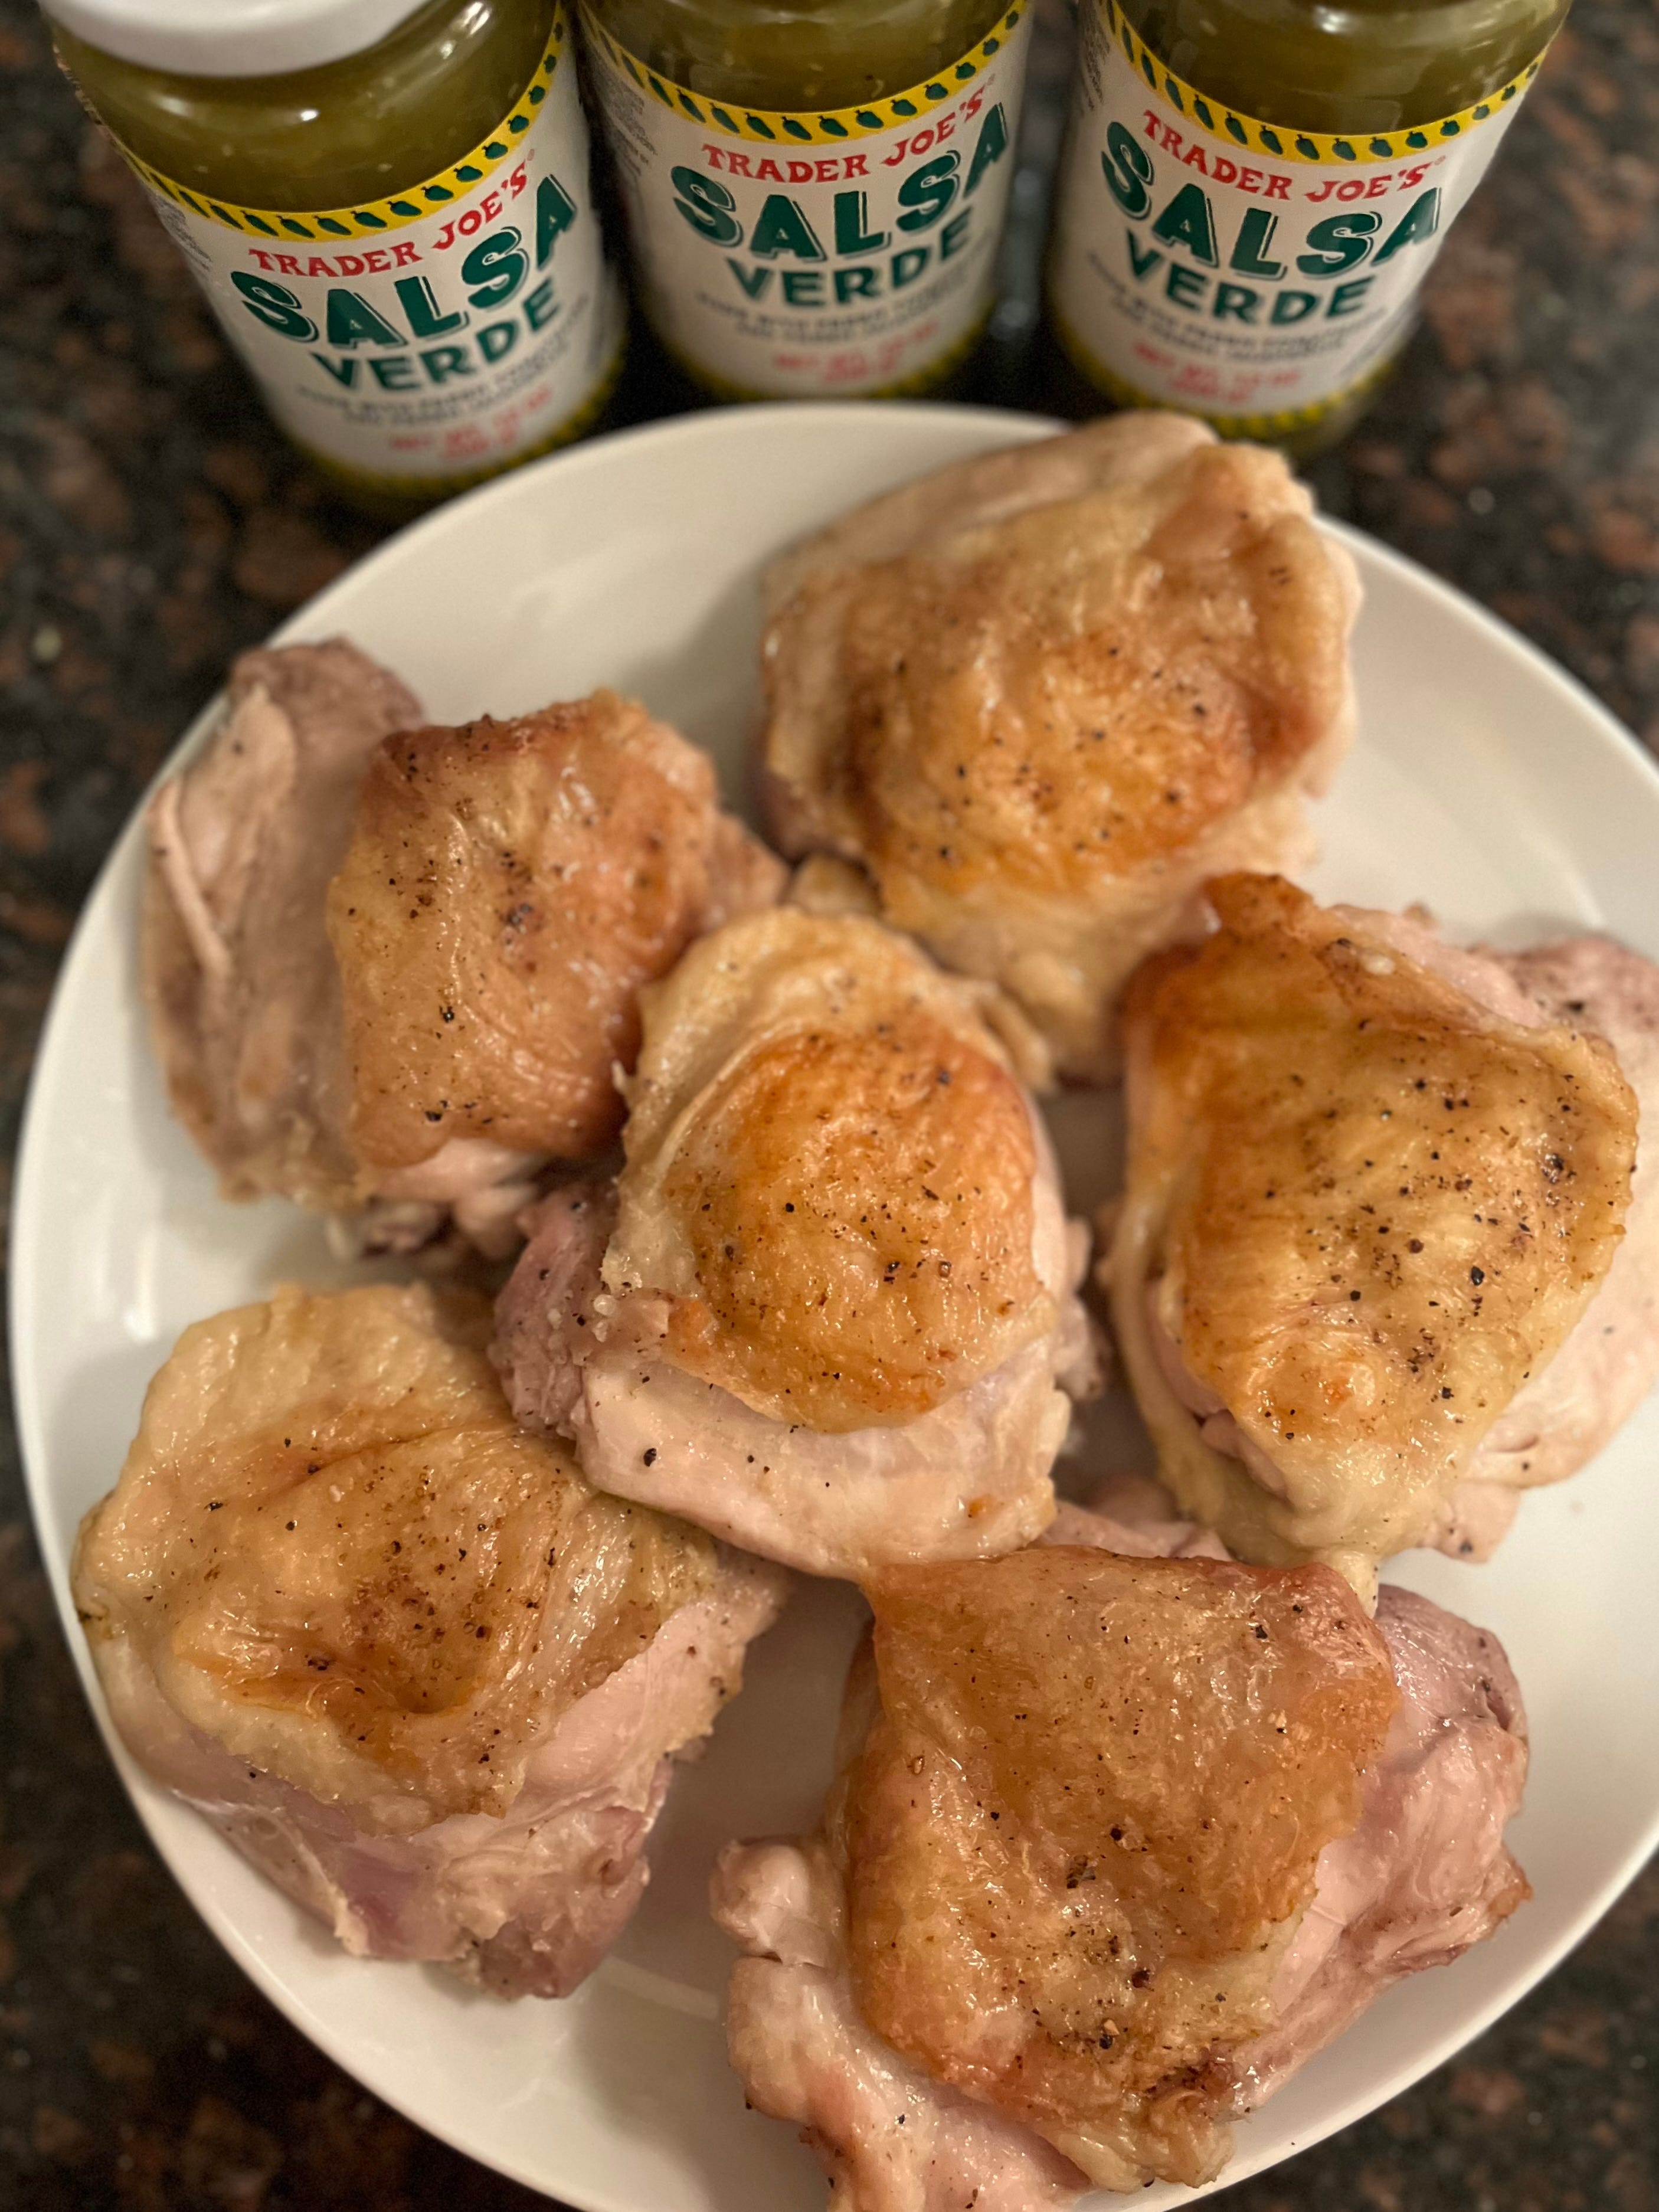
This Salsa-Braised Chicken and Avocado is an excellent place to get your braise on. It highlights the fundamentals of braising without asking you to do too much work. You’re using store-bought salsa verde (I went with the $2 jars from TJ’s), so all you really have to do is brown the meat, which is an essential part of braising. Let’s practice!
Read through the directions provided via the link, but I am going to expand on a few points below while also providing some tweaks.
Salt
Salt the chicken well. Good braises are impossible without well salted meat. So, we’re starting here.
Tips:
Use the 1 tsp of salt per 1lb of meat rule
Season both sides of the chicken thigh AND under the skin. Yes. Pull the skin up (without ripping it off) until you can see the meat underneath and evenly toss some kosher salt in.
Heat
For whatever reason, this recipe has you heating the oven to 400 degrees. No. Braises use low heat, and 400 is not low heat. I set my oven to 325. It added approximately 8 minutes to the cook time, but use a meat thermometer to check.
Tip:
We want to keep the skillet close to the source of the heat, which is at the bottom of the oven. So, move your cooking rack down into the lower third.
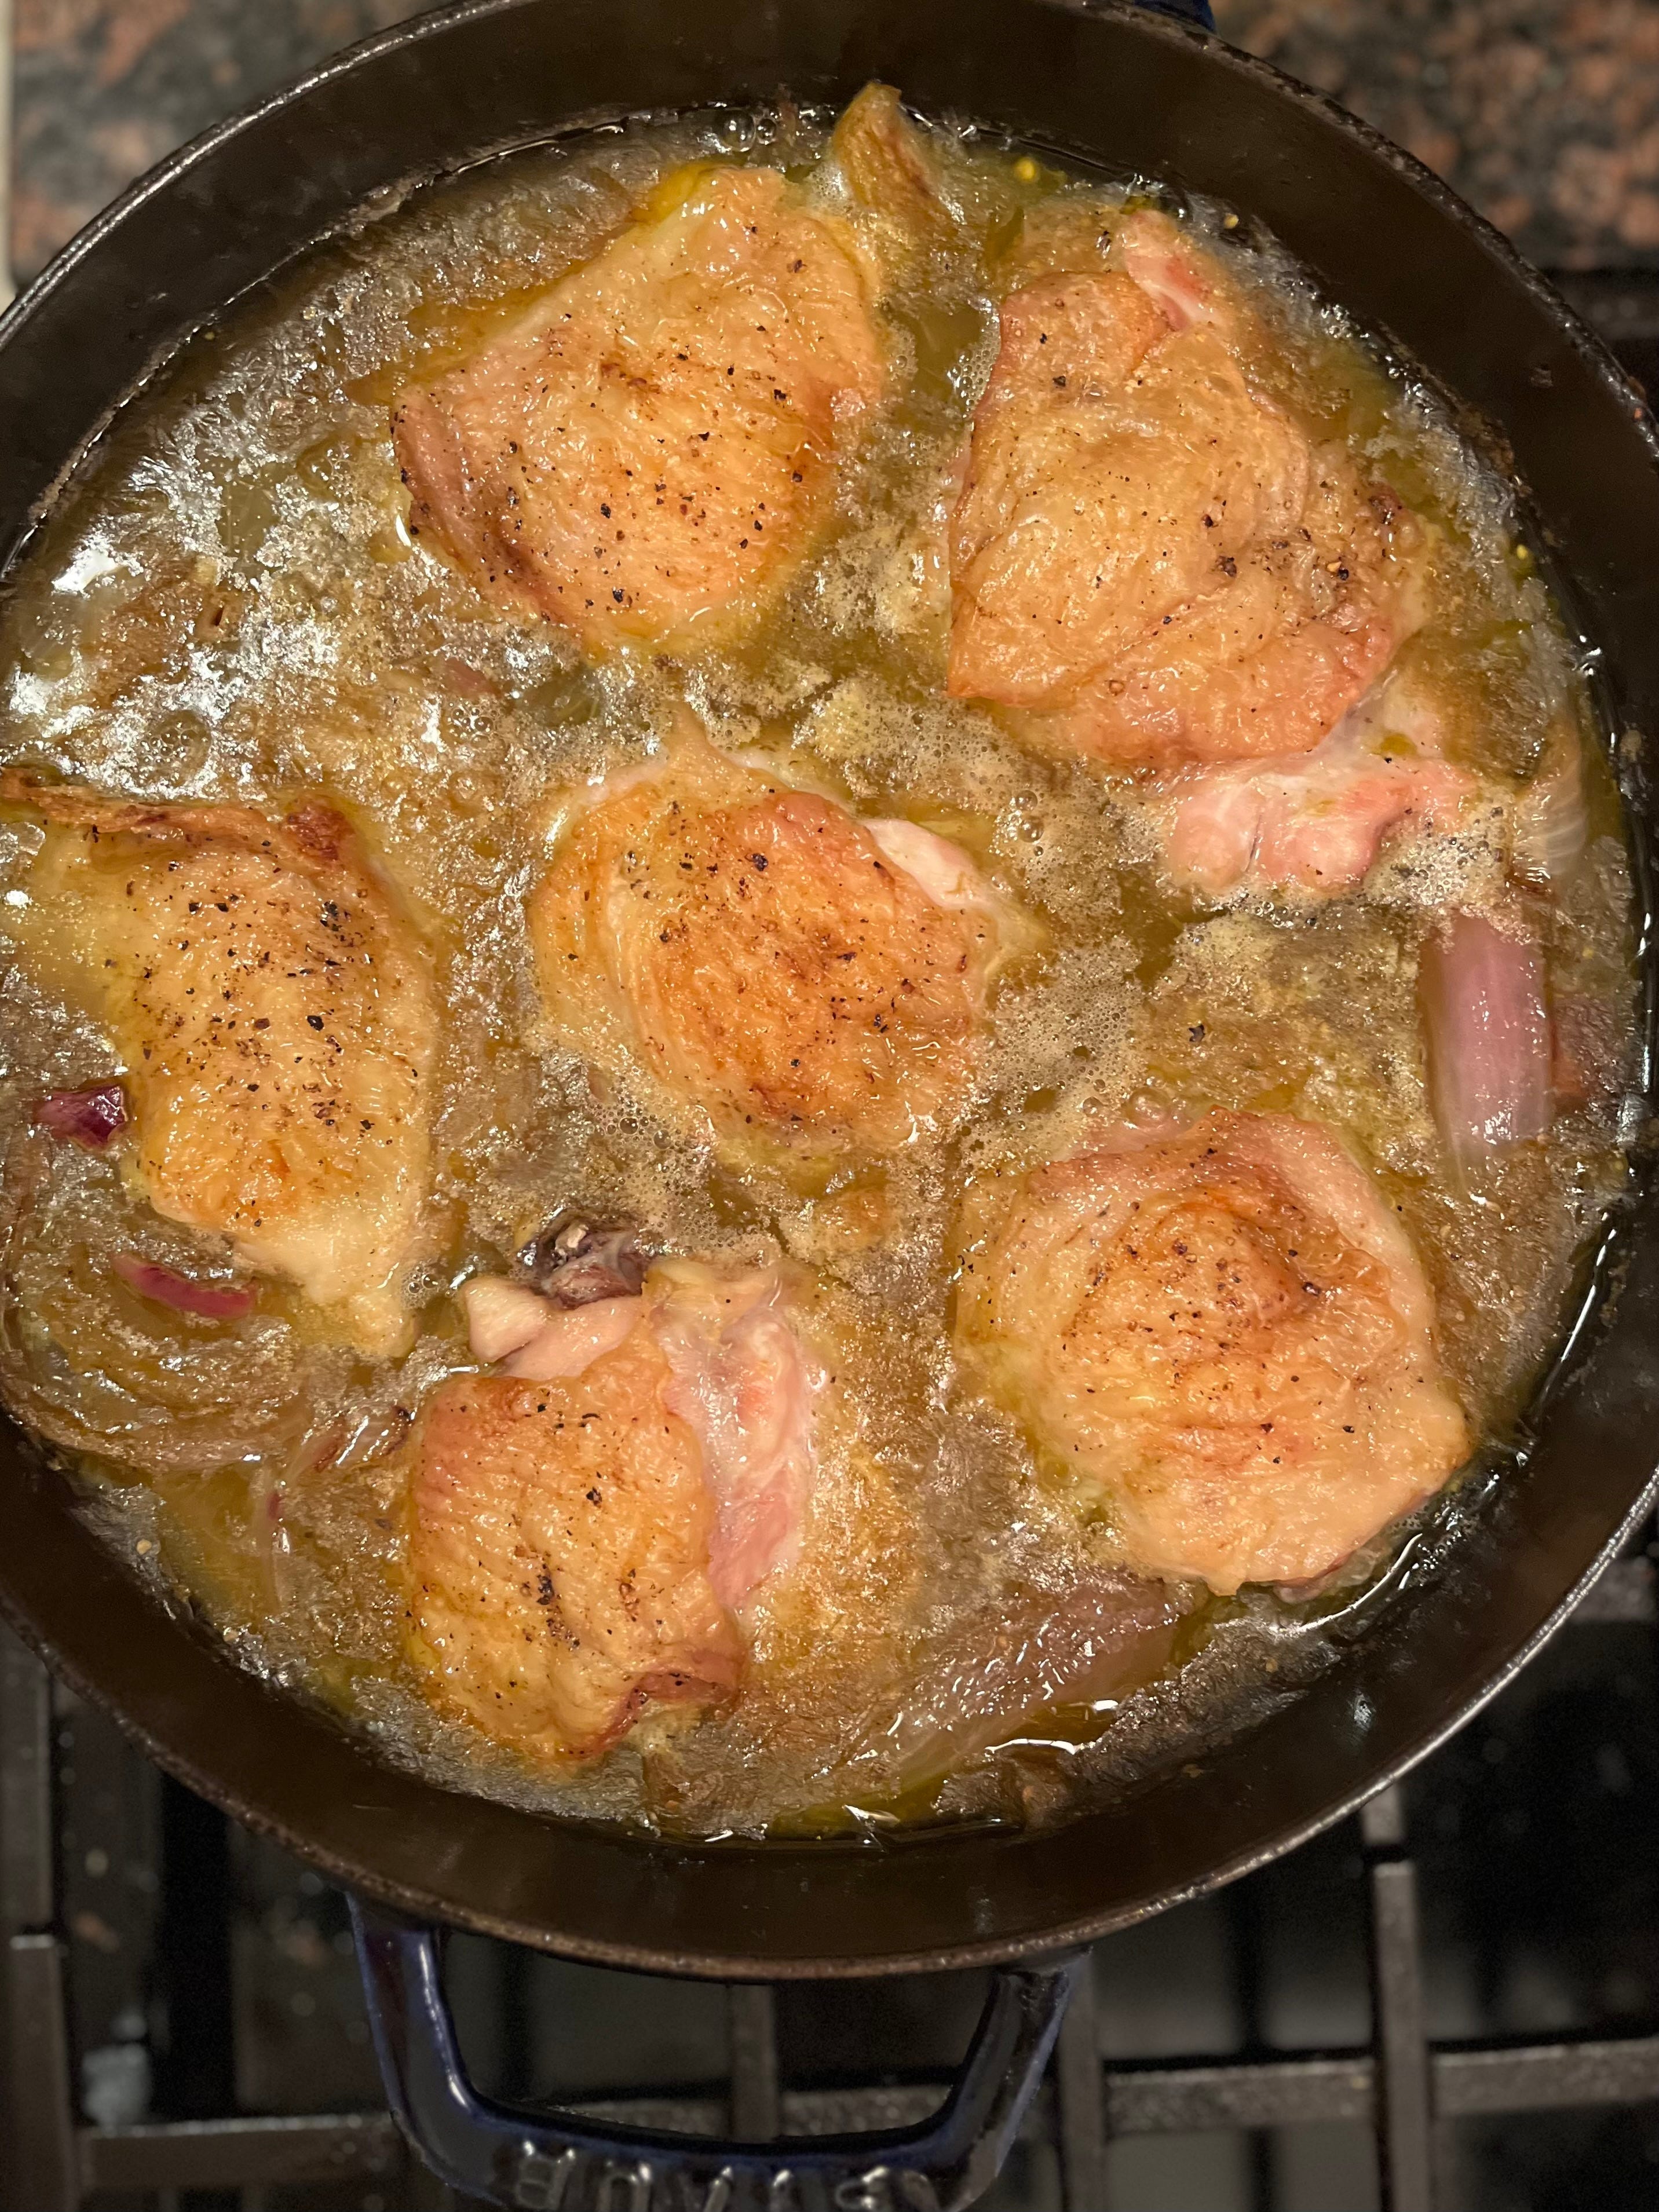
Brown
We’re rendering the fat from the chicken skin here - meaning the chicken is going to provide its own “oil” - so we don’t need to put any oil down, but do make sure to put the chicken skin-side down. We’re starting with a “cold” pan (i.e. one that isn’t over any heat); this is one of a few ways to brown meat. The fat from the chicken skin is going to be released via the heat over a long-ish period of time (12-15 minutes) while you let it cook undisturbed. The end result is crispy chicken skin.
Tips:
At the halfway point ~7 minutes, rotate the pan 180 degrees to ensure even browning.
The chicken is ready to be removed from the pan when it peels away from the pan without too much resistance. I still recommend moving gently and slowly. If you find that the skin is still holding onto the bottom of the pan for dear life, give it another minute or two.
Aromatics (if desired)
I’m a sucker for caramelized red onions, so I edited the recipe and added thicker wedges of red onion to the pan after removing the chicken and before adding the rest of the components of the sauce; remember, in a braise the rendered fat and any caramelized bits are part of the sauce as well. Cook the onions for 3-4 minutes on each side.
From here you can follow the rest of the recipe as it’s described. Just make sure that before you put it in the oven you do not submerge the chicken too far into the sauce (or the skin will lose its crisp).
My Kitchen Mistake Is Your Gain
I made an egregious mistake the other night, and I was upset…if I’m trying to be casual about it. My husband, in all of his caring and thoughtful kindness, said “Put it on the Substack.” In all honestly, it actually was the kindest thing for him to say at that moment. Because the only thing that can make me go from mad to somewhat less mad is knowing that I can reiterate those mistakes to you so that you won’t make them.
I won’t belabor the story with details. All I will say is that we shouldn’t be washing our mushrooms because, evidently, mushrooms are like sponges. Once water gets in, it’s hard to get it back out. Rub the dirt off with a paper towel. If you get them wet you’ll have a hard time achieving a nice, brown caramelized mushroom (water is not great for caramelization).
One non-food related thought
I love NYC in the fall. People say it. Singers sing about it. Authors write about it. And, it’s all true.

Keep calm and braise on, and I’ll see you in the kitchen!
Xo,
Rach
For a deep dive on braising I recommend: Salt, Fat, Acid Heat by Samin Nosrat and Start Here by Sohla El-Waylly.